In this section, you can configure the tiles / categories you would like to use in your Guide.
By default, every new Guide is equipped with 7 pre-defined tiles. All tiles, except for ‘Your Holiday Home,’ are standard and will appear on all Guides in your portfolio.
The ‘Your Holiday Home’ tile is unique to each holiday home/apartment, allowing you to add custom content that pertains to individual properties.
The 7 predefined tiles are:
1. The top Guide Banner
2. Welcome: This tile provides an opportunity to write a welcome message for your guests
3. Your Holiday Home: The content of this tile is created in the Properties section.
4. General Information: This tile can list all the general information that is relevant to all properties
5. Food & Drink Map: You can select filters to show the type of establishments you want to appear on the map. For example, if you only want to show cafes and restaurants, you can choose only these filters from the drop down menu.
6. Attractions Map: You can select filters to show the type of establishments you want to appear on the map.
7. Code of Conduct: This tiles describes the set code of conduct rules and regulations for the guest to be aware of during their stay.
You can either use these predefined tiles or remove them.
You can also ADD as many new tiles that you need.
Each tile comes with a template that you can use or discard if not relevant to your business.
STEP 1: OPEN CATEGORIES IN YOUR GUIDE
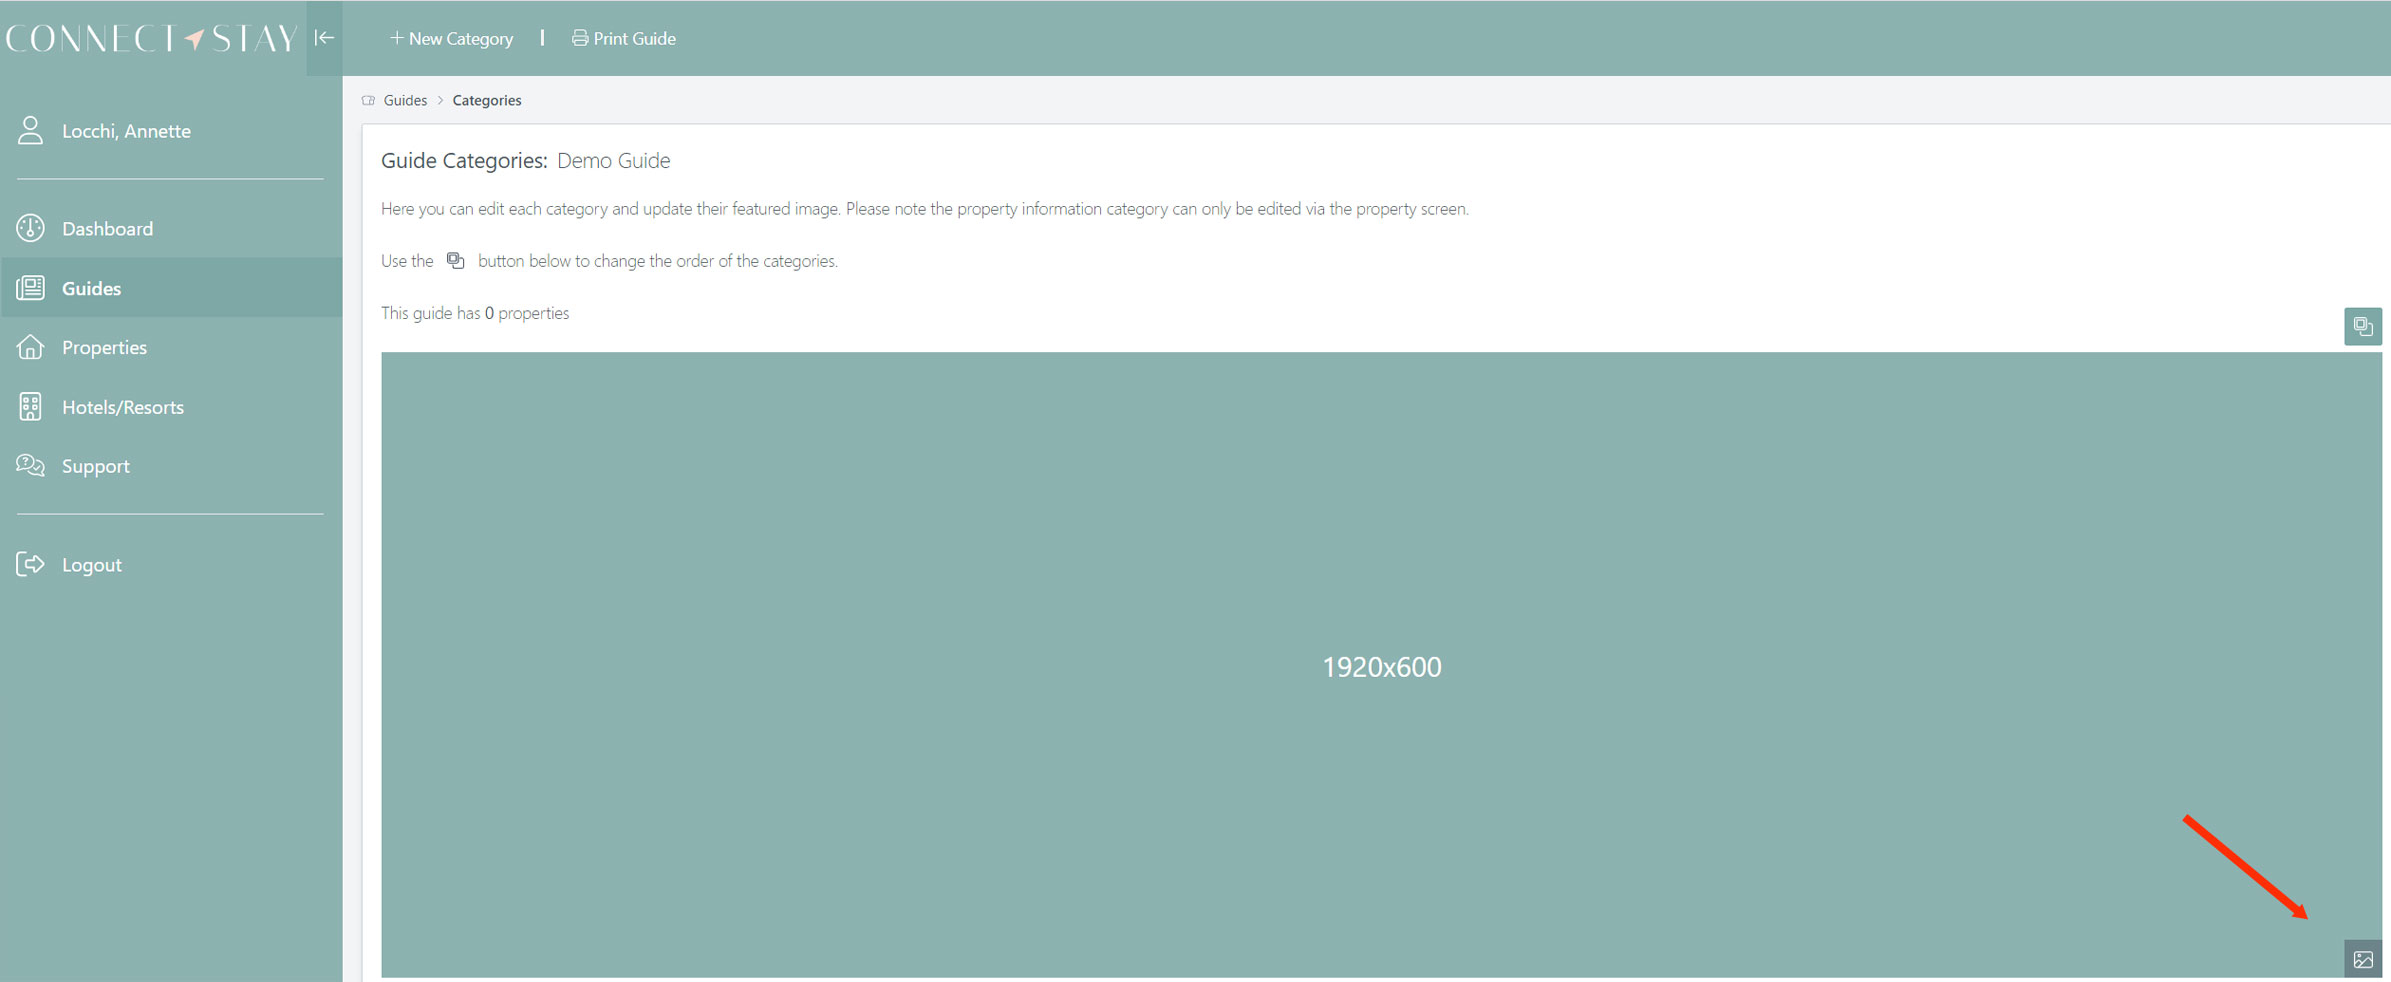
Go to GUIDE → Select the CATEGORIES ICON on the bottom of the Guide

Step 2: Configure each individual Tile / Category
1. First Tile is the Top
Banner : Select ![]() on the bottom right of the tile to upload a Featured Image for this tile which will be displayed on the top banner of the Guide and also in the backend of your Connect & Stay
on the bottom right of the tile to upload a Featured Image for this tile which will be displayed on the top banner of the Guide and also in the backend of your Connect & Stay
The optimal image size for the featured image is 1920px X 600px.

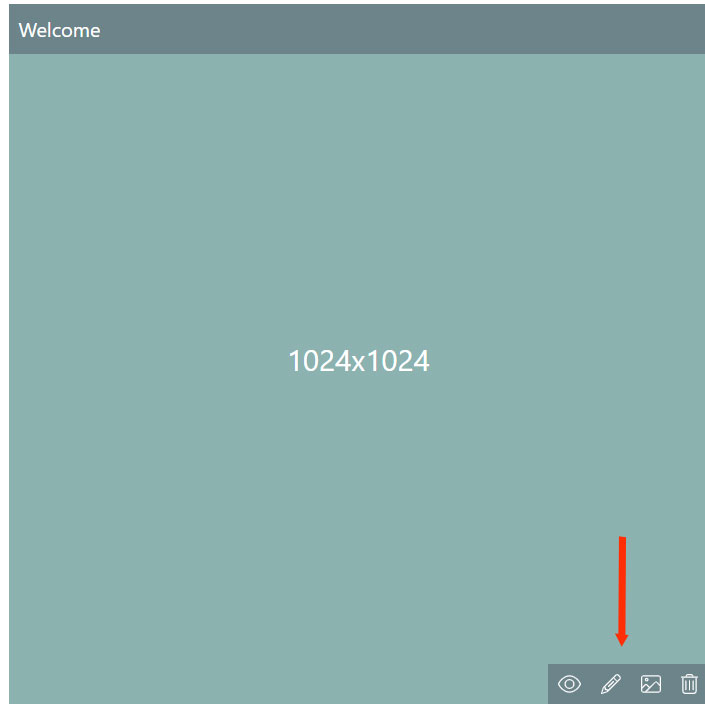
2. For ALL other tiles, you can use the Icons on the bottom of each tile to make changes.

3. Select ![]() to view tile
to view tile
4. Select ![]() to ADD a Featured Image that will display for that specific Tile.
to ADD a Featured Image that will display for that specific Tile.
** IMPORTANT NOTE: There are 2 x Featured Images per tile. This Featured Image is the one that will display on the homepage of the App when a guest is viewing the Guide. The second featured image (below) that you upload once in the Edit section of the Tile will display once the guest selects the Tile. This feature image will display as a banner on this page.
5. Select ![]() to DELETE the tile.
to DELETE the tile.
STEP 3: How to edit the contents of each individual Tile
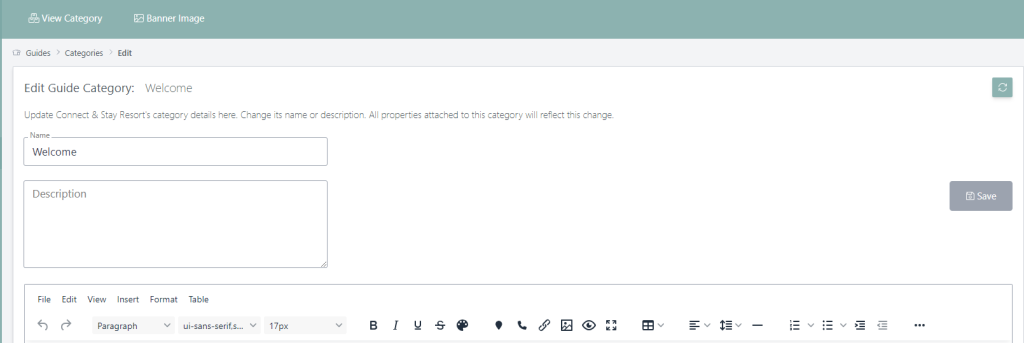
Select a Tile (eg. Welcome) then select ![]() to Edit the tile contents.
to Edit the tile contents.
You can KEEP or AMEND the Name of the Tile to suit your company. This Tile Name is what the Guest will see on their Guide.
Provide a DESCRIPTION of the tile. This won’t be
You can INSERT images and text into each tile using the Text Editor.
IMPORTANT: Select ‘Banner Image‘ on the Top Menu to upload a Banner Image that will be shown at the top of the tile when the Guest clicks into the individual tile, it will display as a Banner Image.

STEP 4: ADD New Categories / Tiles
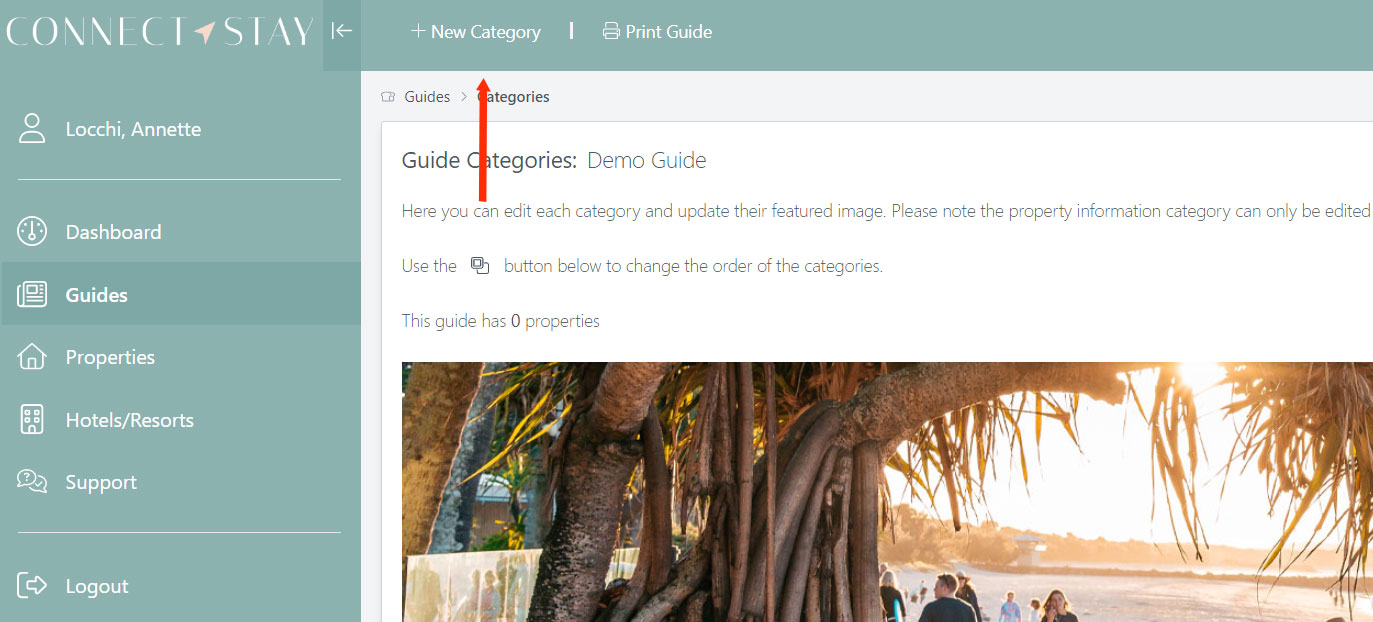
In order to ADD a new Category / Tile, select ‘New Category’ on the top menu.

Select the style of TEMPLATE you want to use for this tile on the top right. You can choose from either a Text or Map format.
TEXT format will allow you to insert text, images etc to build your page.
MAP format will allow you to choose filters to display on a Map.

ADD your Category / Tile Name
ADD a description for this Category
Step 5: Order Categories / Tiles
Select the ![]() button on the right hand side to manually change the order of the tiles.
button on the right hand side to manually change the order of the tiles.
Drag and Drop the Category Tiles to change their order. The order is saved as you change it.
